

Virtues of a Well-Trained AI
Last weekend, I had some time on my hands.
My wife was in Vegas for a soccer tournament, my daughter was at UCLA for a Model United Nations conference, and my son was at UCI where he always is.
So I went out drinking.
Haha, no I didn’t. I stayed home and worked on expanding my repertoire of production techniques. But I did set aside some time for fun.
And what could be more fun than training Stable Diffusion, a graphical AI engine?
I fed it photos of my wife using Dreambooth to create a dozen or so images that look just like her. Not that’d you’d know one way or another.
I wasn’t sure it was going to work, but once it clearly did, I trained the engine on myself using press photos.
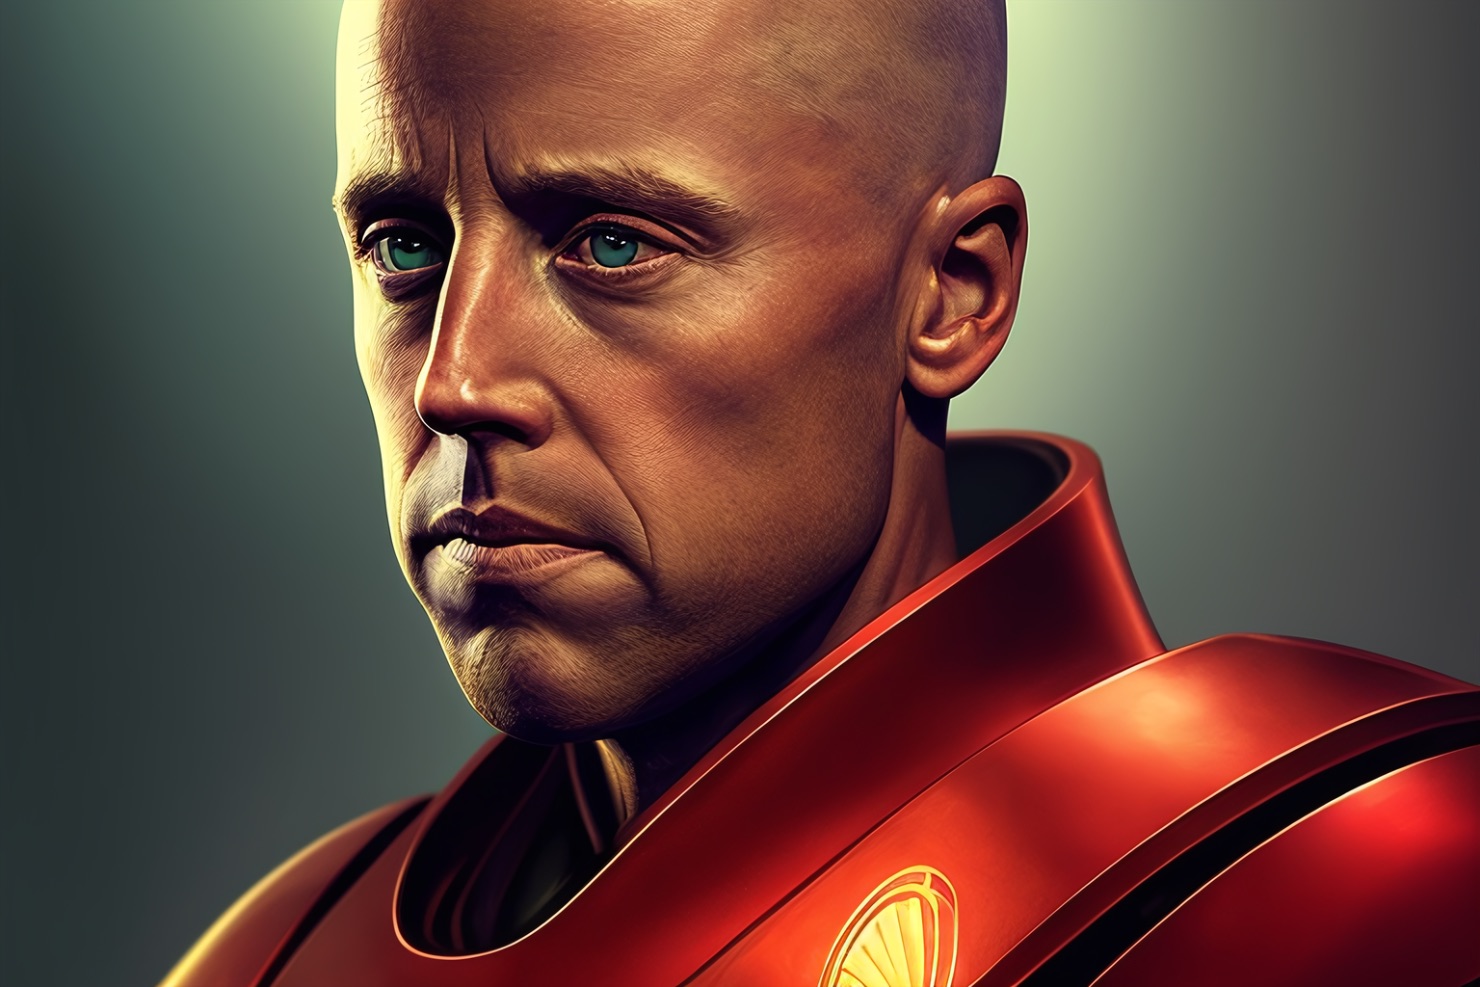
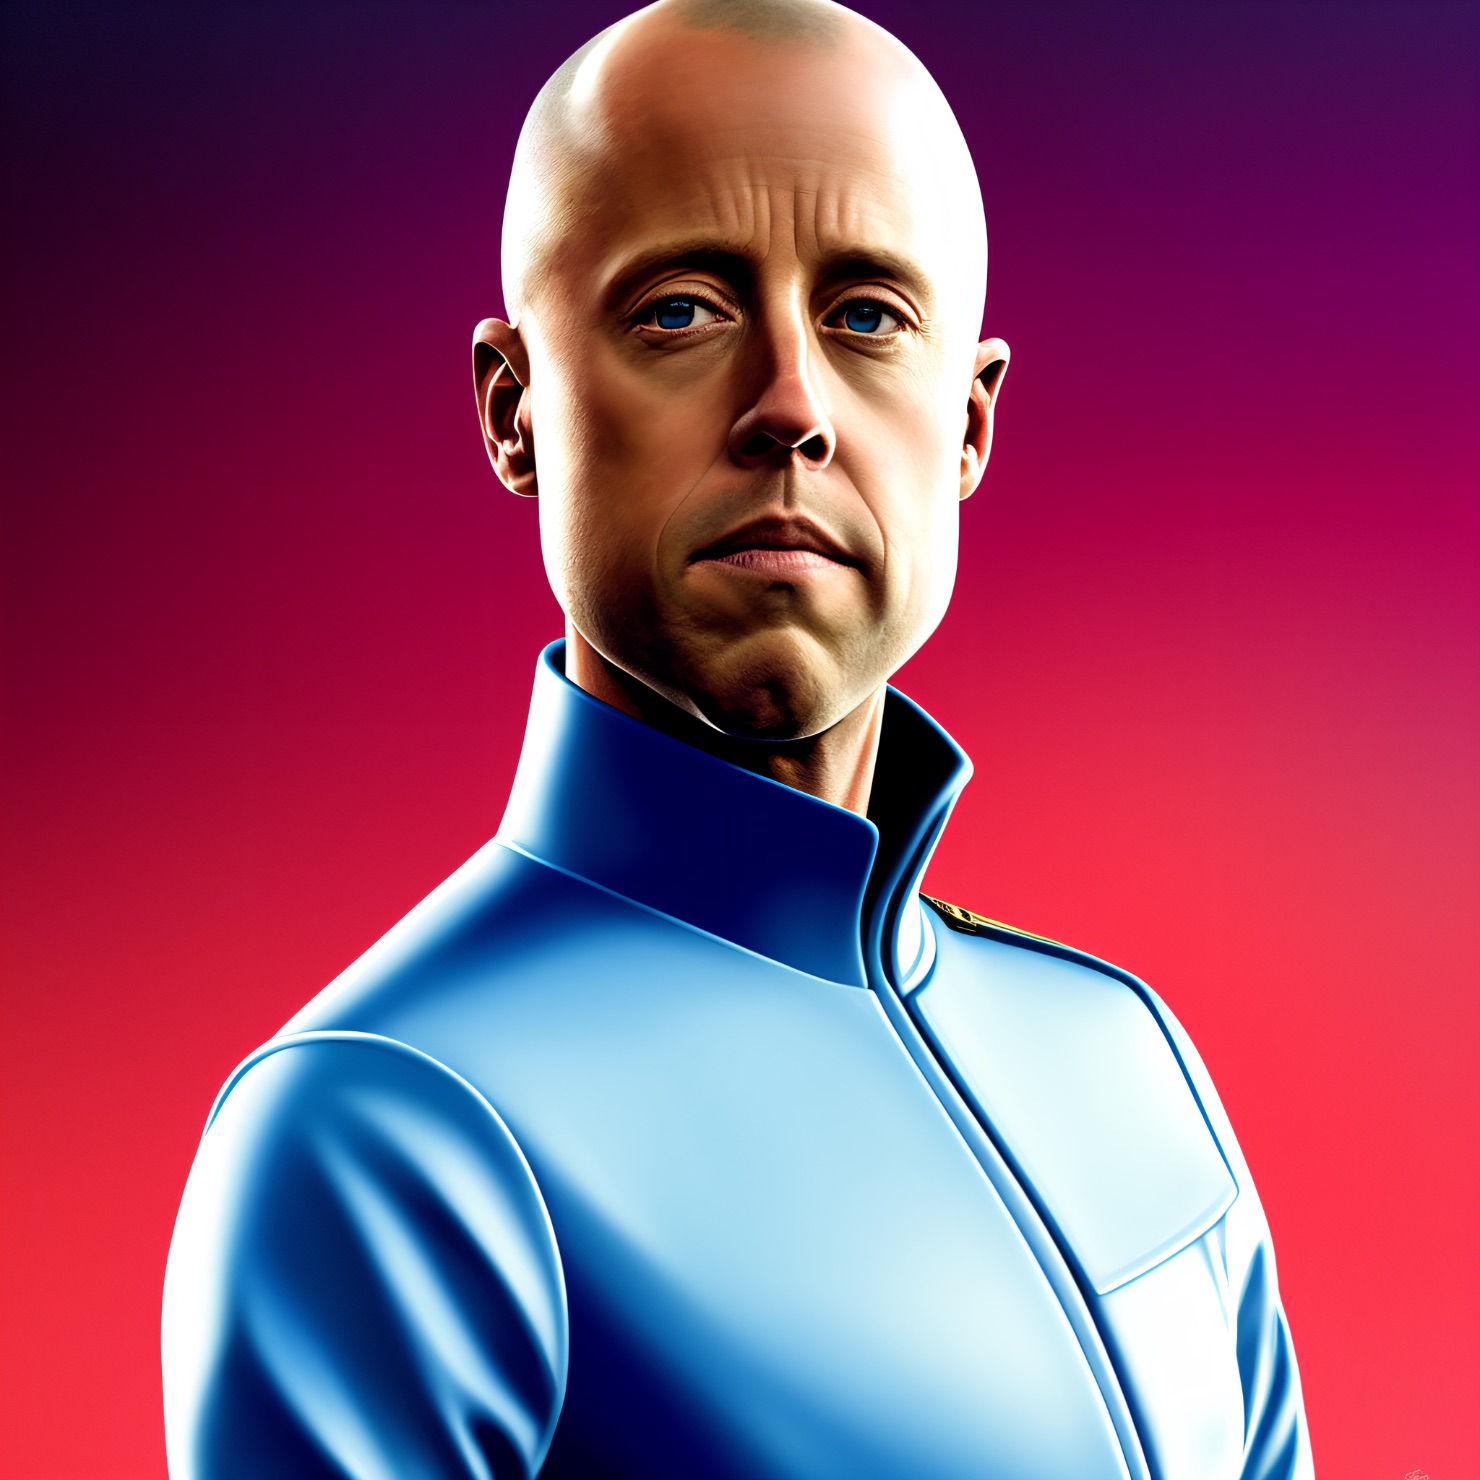
Here’s one of me looking sort of “synthwave badass.”
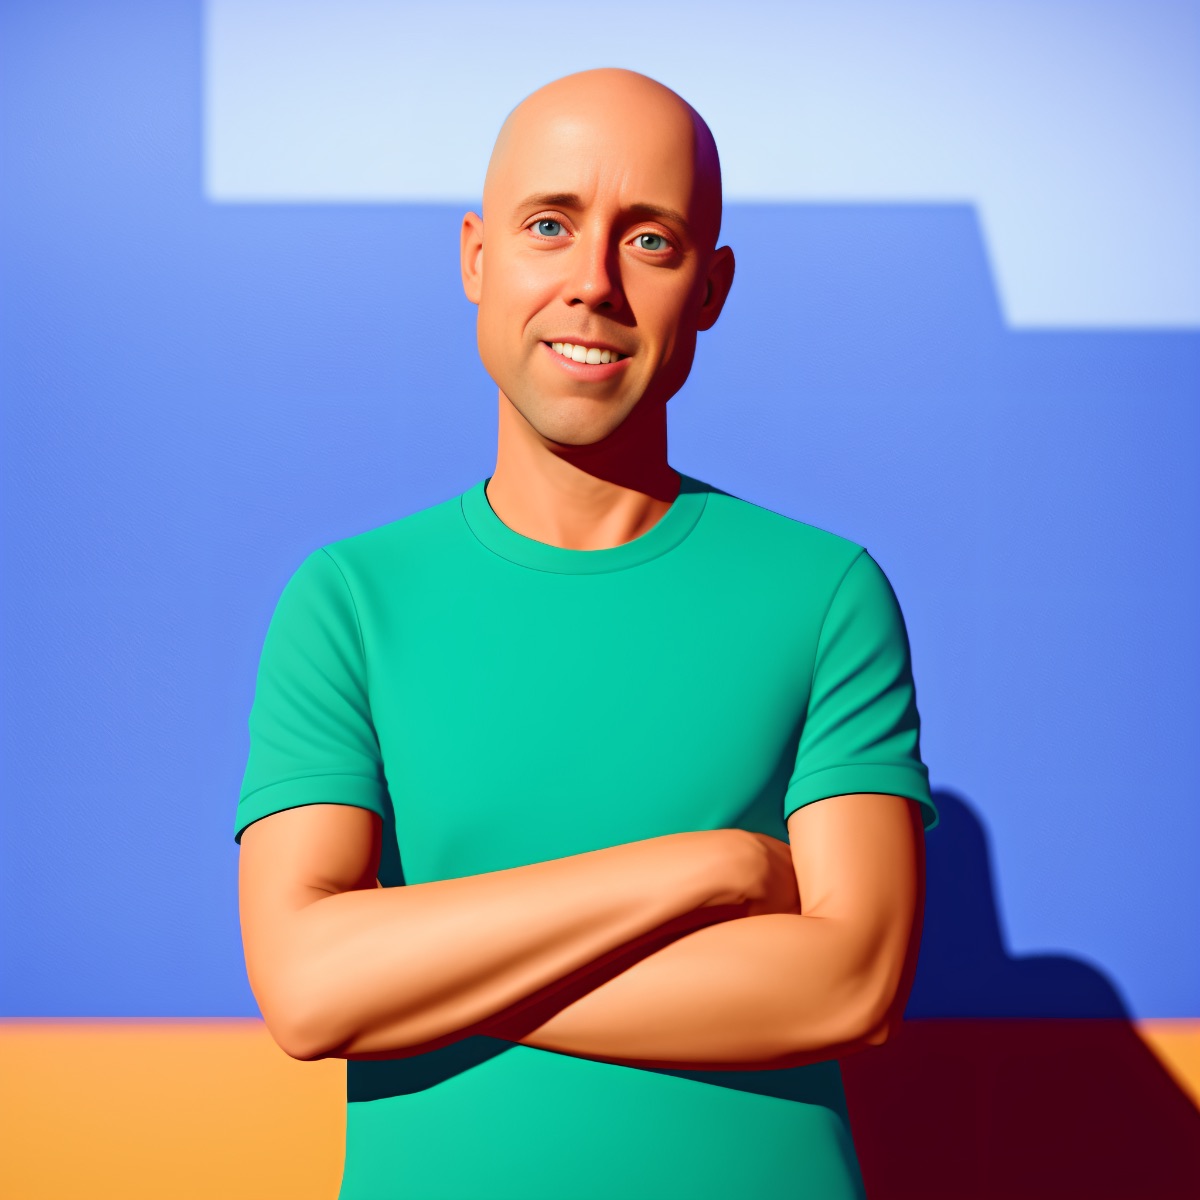
And at the other end of the toxic masculinity spectrum, here’s me as a Pixar character:
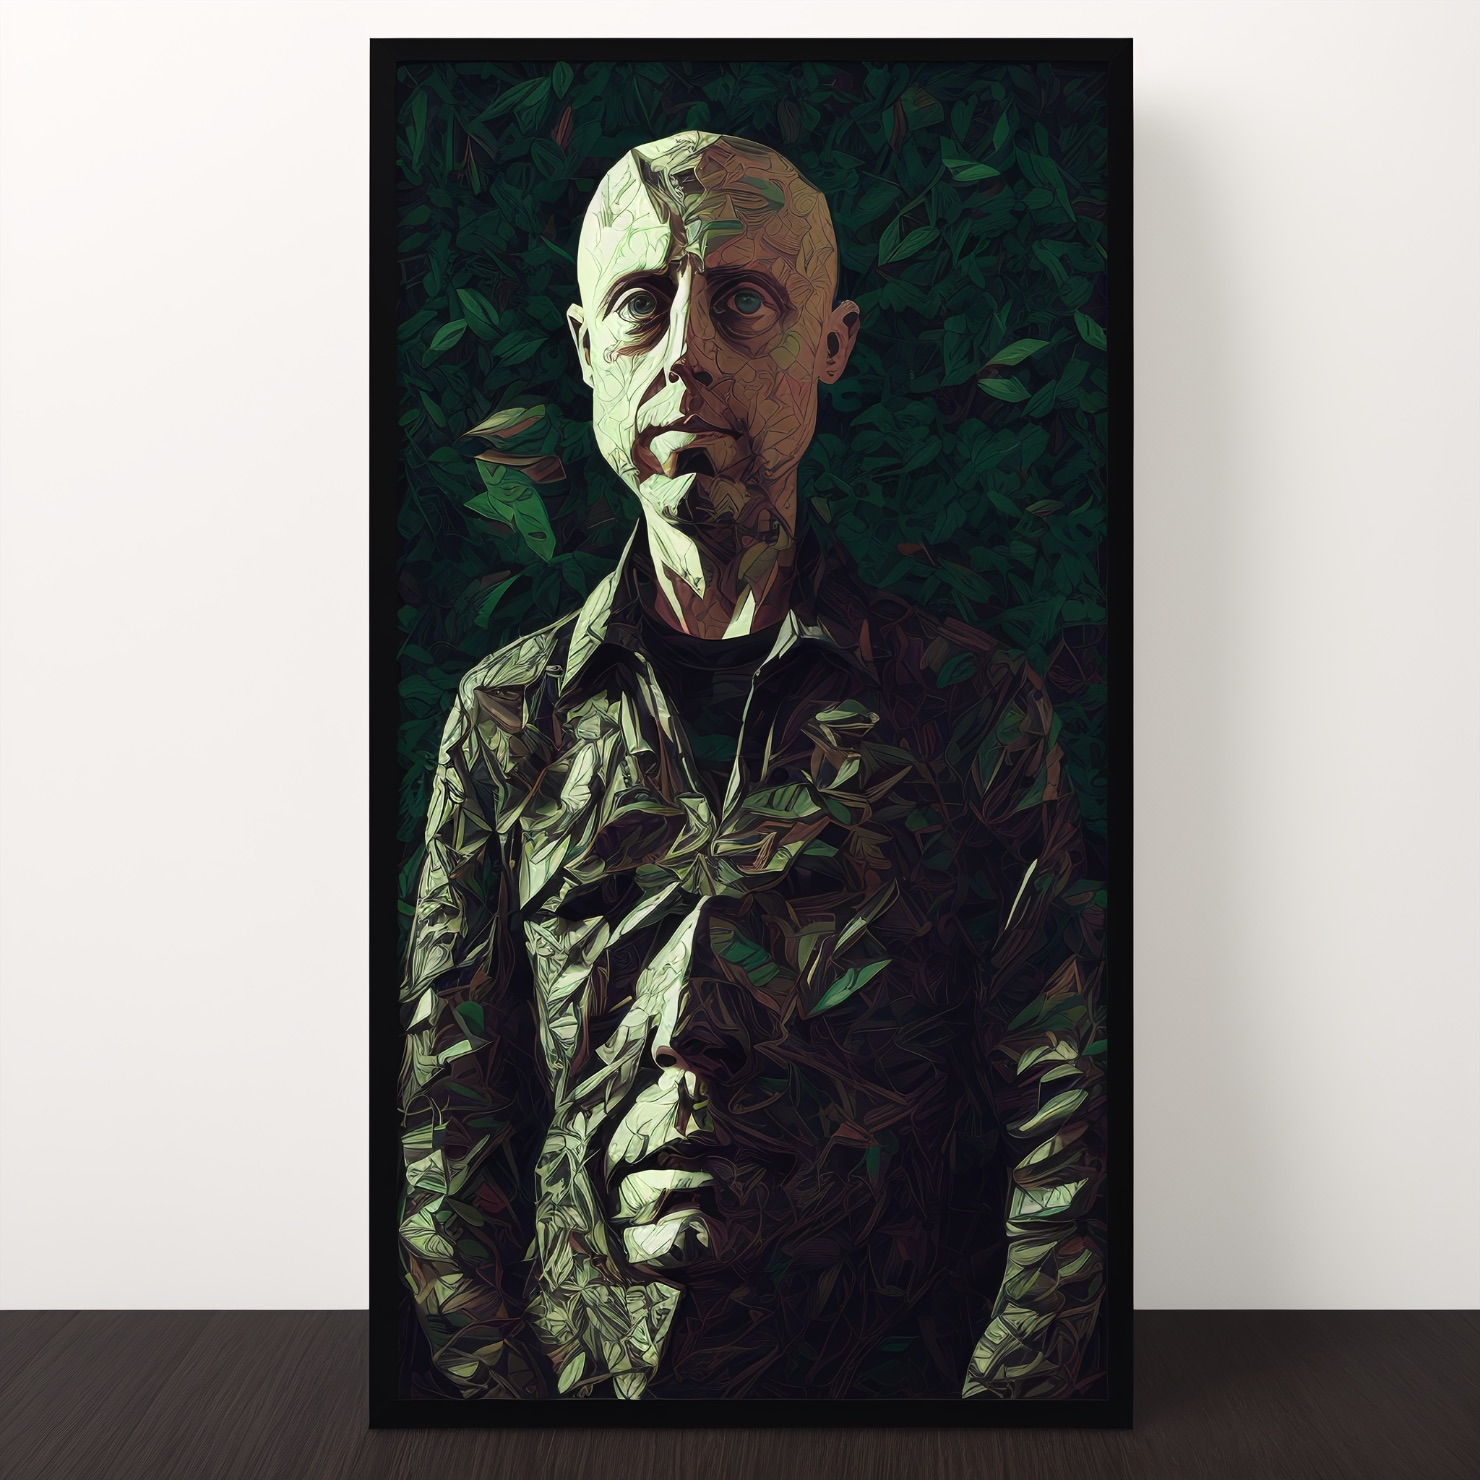
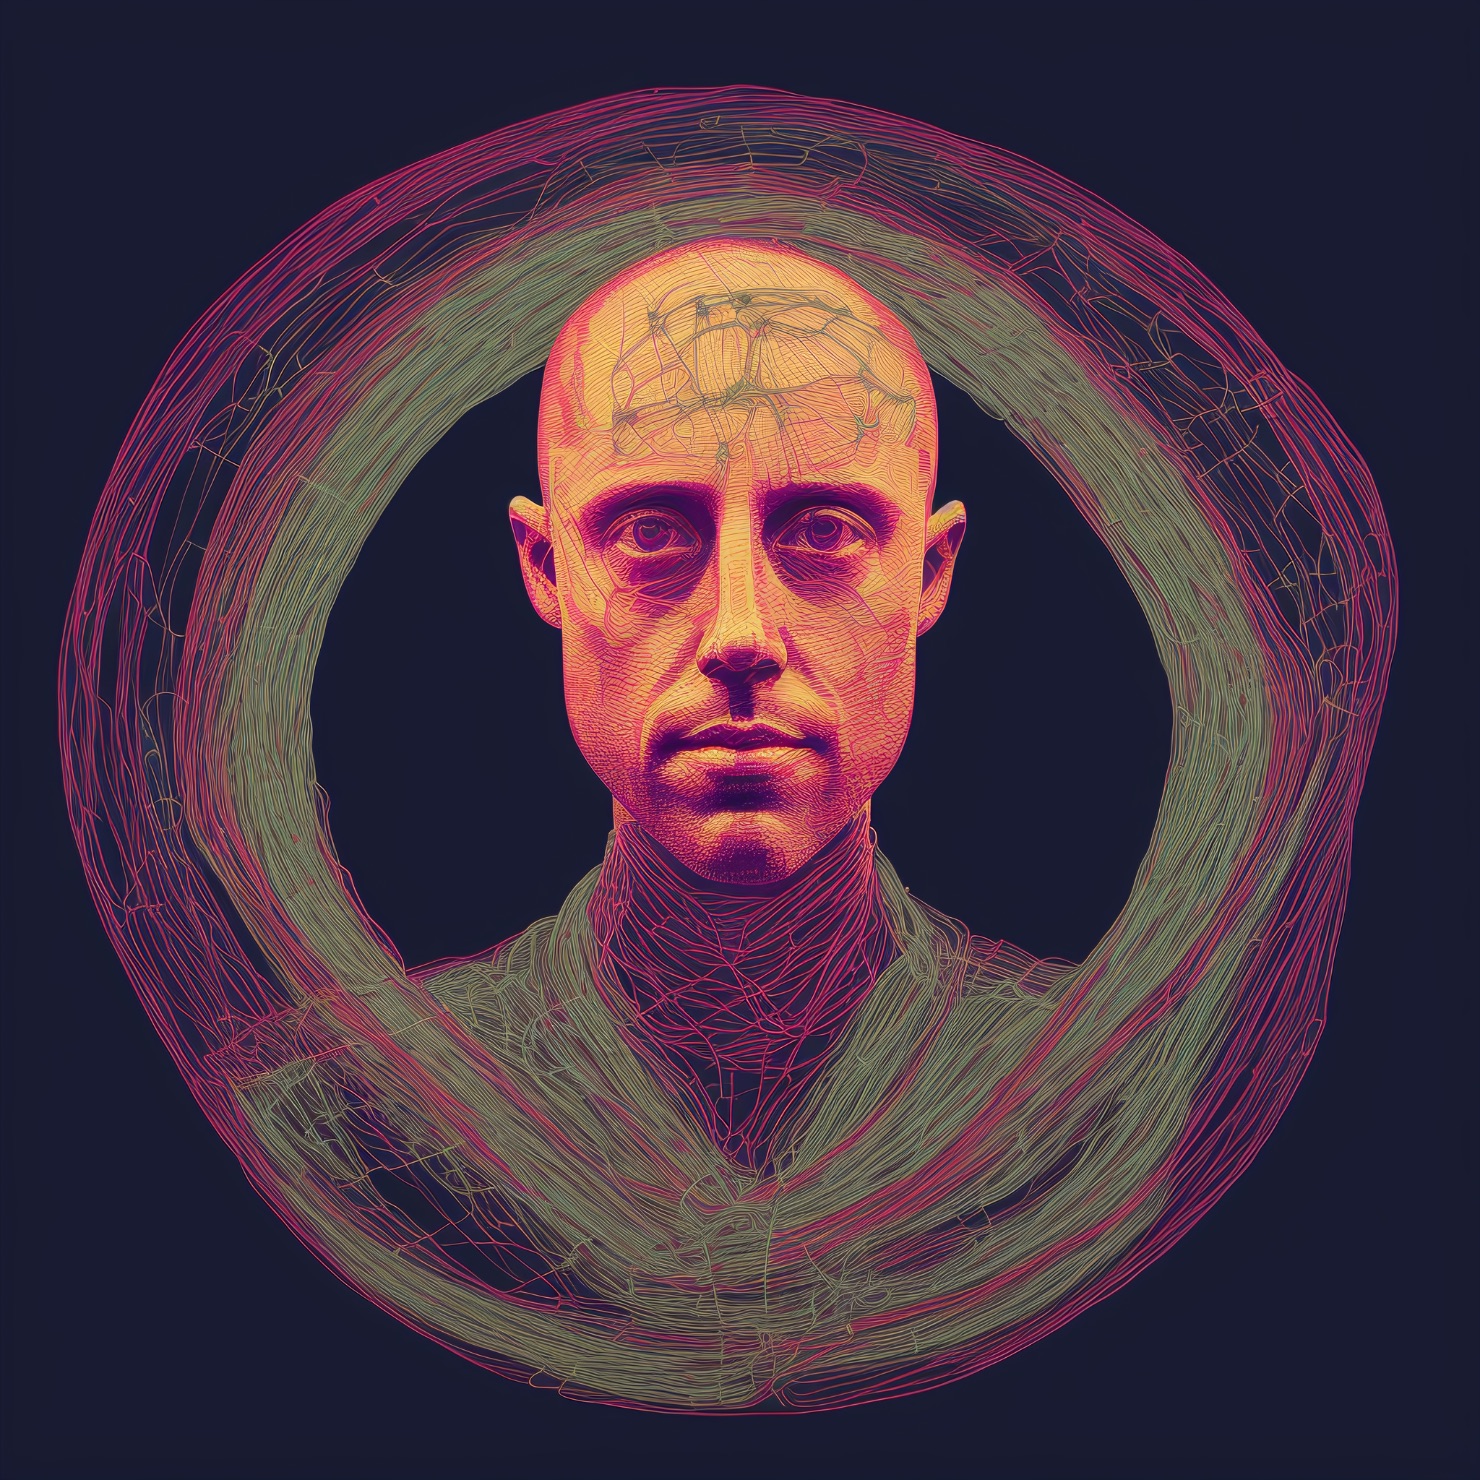
Here’s a totally not creepy one of me made out of leaves, with a second personage protruding from my abdomen:
Swapping the word “leaves” for “wires”:
This is… whatever this is:
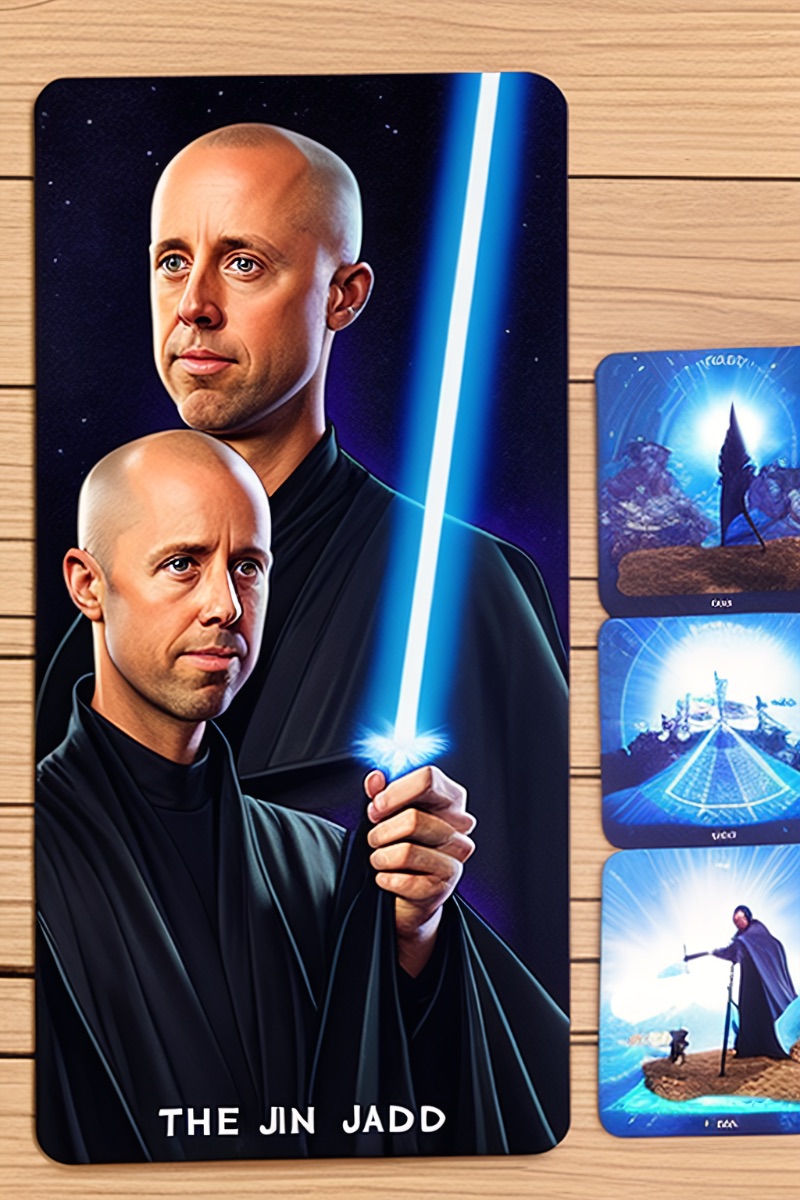
Finally, due to popular demand, here’s a playing card with me as a Jedi. They call me The Jin Jadd! 😮
This will all be photorealistic in six months, tops. As if we as a society didn’t already have a hard enough time discerning truth from fiction!
In the meantime, got any suggestions for what I should make? 🤔
Training Stable Diffusion with DreamBooth
I sent the above out as an email a couple days ago, and posted it to social media yesterday.
Since then, at least a dozen people have asked me how I did it, hence this post.
AI image creation has come a long way since I last wrote about it in August. Those images are laughable to me now. And to think, I was willing to use them as cover art!
While I’m no expert, I’ve been keeping up on YouTube with guys like Olivio Sarikas, Scott Detweiler, Patrick Galbraith, and Sebastian Kamph. Seems like every day there’s a new development!
As such, I’m not going to attempt to write a step-by-step guide. I’m just going to point you in the right direction, because the specifics may not apply tomorrow.
Taking a monster step back, there are three main graphic AI tools accessible to the public right now: Midjourney, DALL·E 2, and Stable Diffusion.
Stable Diffusion is open source, and as such, has many different implementations. The most accessible is DreamStudio, which runs in your browser.
You can even run it locally on your own computer, and I do! Problem is, it’s slow. A much faster, cleaner, and simpler way to do it is using Google Colab.
I’m amazed that Google Colab is a thing. Essentially you run code on their servers and graphics cards, for free!
I’m paying $10 a month for Colab Pro, but I can’t tell the difference from the free version. My understanding is I’m less likely to get booted off for inactivity, and I could select a higher-end graphics card if I wanted to.
Okay, here’s the barebones “how to” part. Go here, scroll down, and click on the AUTOMATIC1111 screenshot (the one on the left):
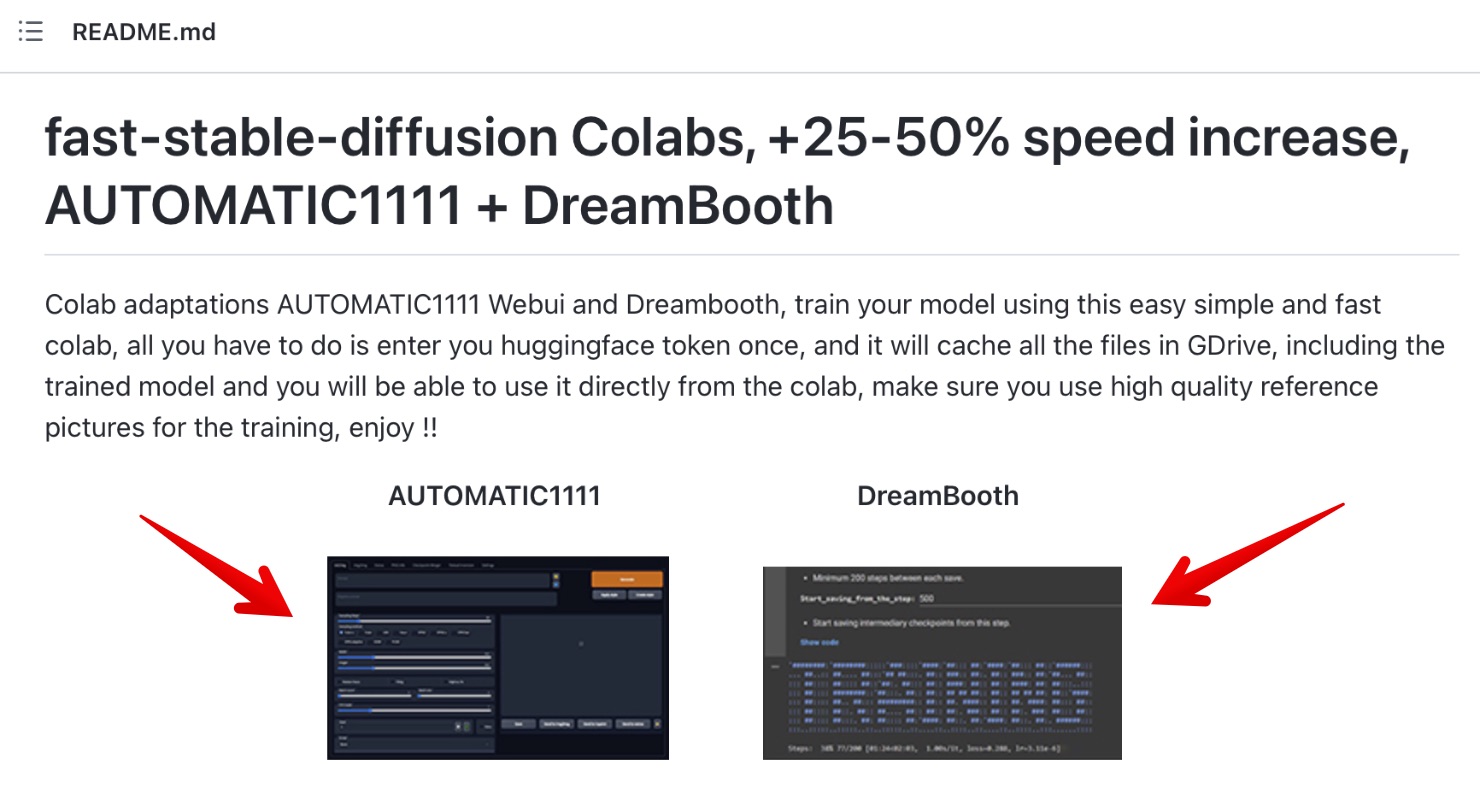
Click on the little play buttons on the lefthand side in sequence. It’ll probably take 10 minutes to get fully up and running.
The last step is to click on the generated link at the bottom of the Colab notebook, which will open up the AUTOMATIC1111 interface in a new browser tab.
If that’s all the instruction you need, kudos to you! Most likely you’ll want to seek out guidance on the Github page, YouTube, Reddit, and/or Discord. As of this writing, there’s a fantastic guide over on ByteXD.
Here’s a peek at the AUTOMATIC1111 interface (click to enlarge), with roughly the settings I used to create the featured image at the top of this page:
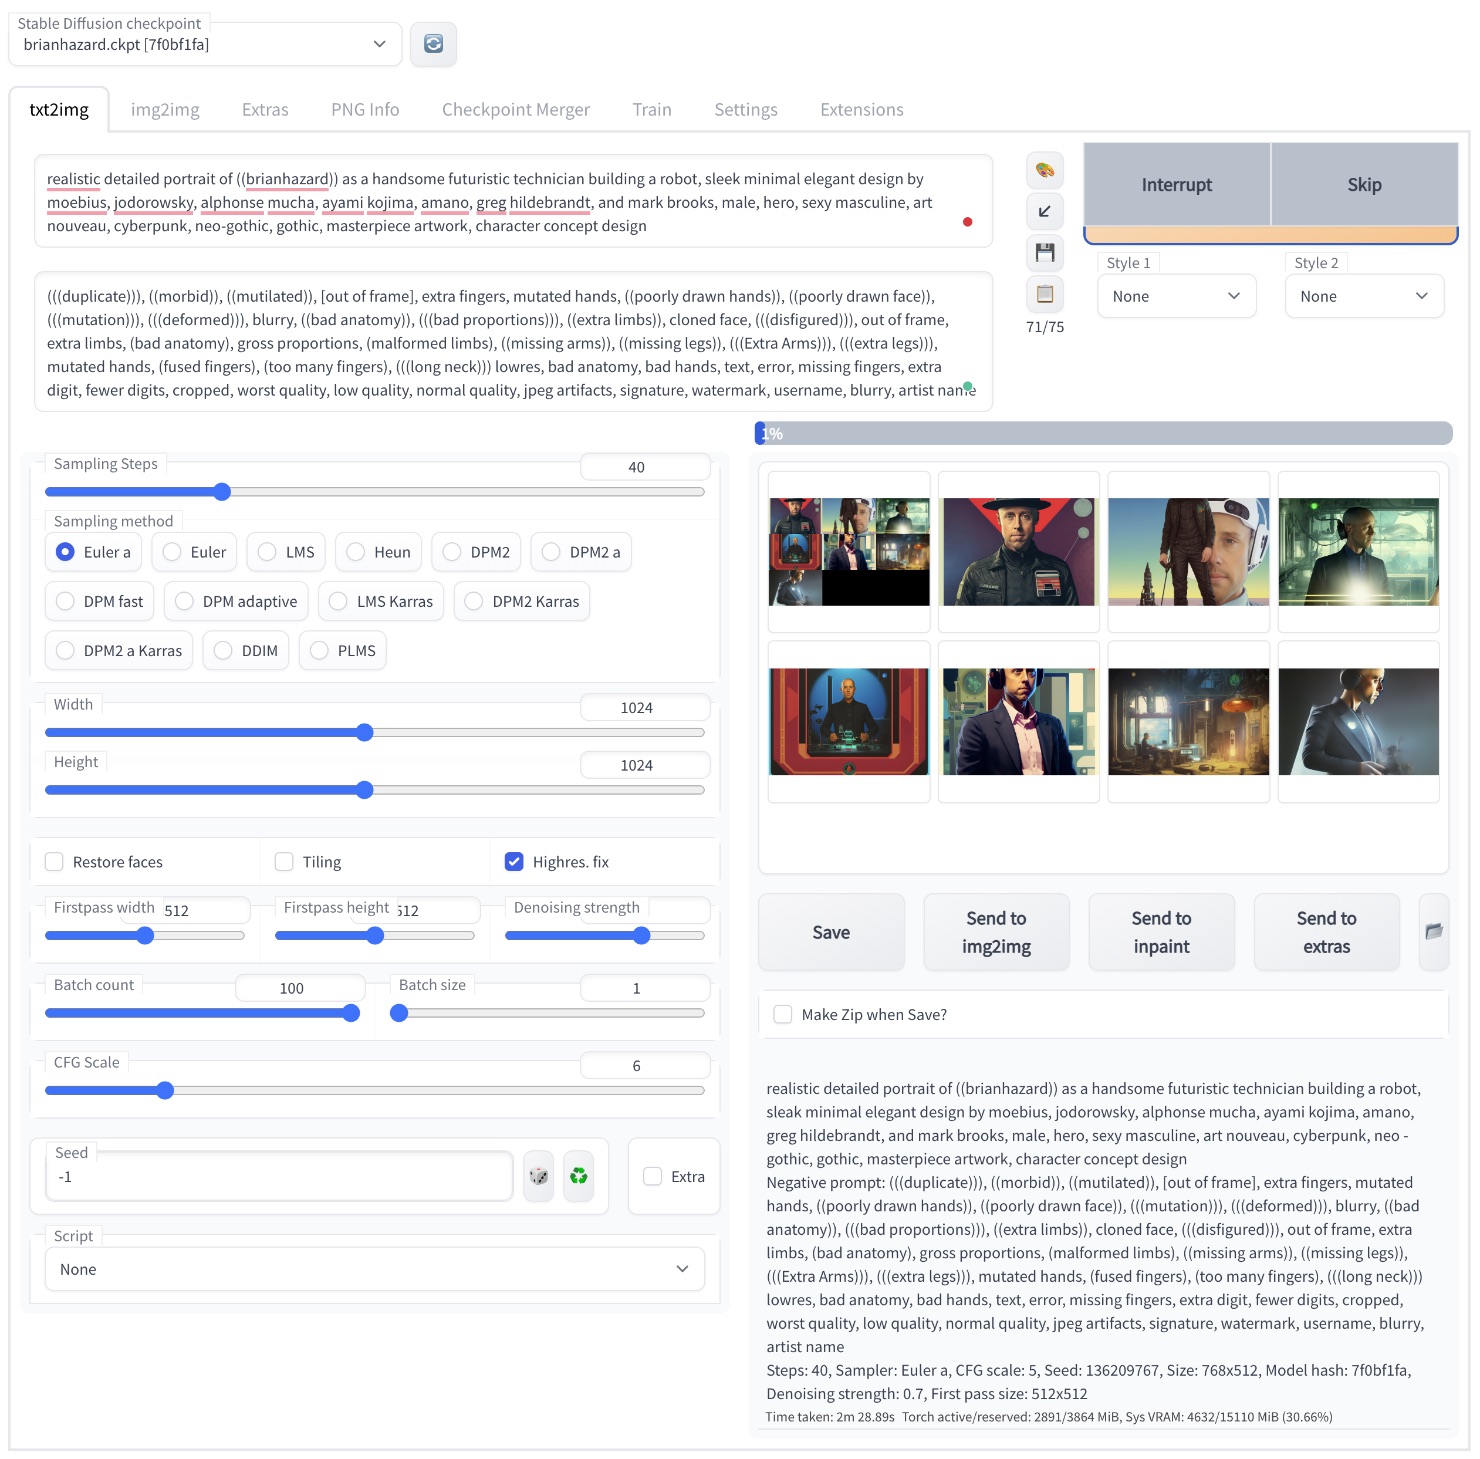
I borrowed the prompt from an image I liked at Lexica, modifying it for my needs.
Okay, so now you’re running Stable Diffusion on Google Colab. The next step is training the model using DreamBooth.
You access the appropriate Colab notebook in the same place. This time, click on the screenshot on the right.
You’ll need 15 or so photos of the subject, center-cropped to 512×512 pixels. It can be a person or even a pet!
You’ll end up with a .ckpt (checkpoint) file, which you’ll move into the appropriate folder on Google Drive so that you can select it from the AUTOMATIC1111 interface.
There’s so much more to explore! Inpainting, outpainting, upscaling, even animation.
The Thorny Ethics of Image AI
As you can imagine, artists are less than thrilled at the prospect of being replaced by code.
I designed cover art for three releases so far with the help of AI, and I don’t see myself hiring a pro again, at least for singles.
And I’m not alone! As a SubmitHub curator, I see dozens of releases every week with AI-generated cover art.
I know how it feels. Way back in 2014, I wrote about automated mastering and made a strong argument for why a pro is superior. Even today, it’s not even close, at least if you want the tracks on your album to match.
Back then I’d get a half dozen new mastering jobs a month purely from word-of-mouth. These days, I’m down to maybe one.
Now I’m mostly producing for artists from an earlier stage in the process, including vocal editing, mixing and mastering. I’ve adapted as best I can, but I’m definitely working and making less.
AI mastering is even featured in the latest release of Ozone, just as AI image generation is going to be part of the next version of Photoshop.
Like it or not, AI is going mainstream.
In one sense, graphic artists have it worse. It’s not like someone can request “mastering to -9 LUFS in the style of Brian Hazard.” But with image AI, anyone can do just that.
It’s one thing when we’re talking about Van Gogh or Monet, but more often living and breathing working professionals are named in the prompt. Their styles were scraped from the internet without their consent, and they aren’t receiving any royalties for works generated under their name.
As you can see from the screenshot above, that hasn’t stopped me from generating images using a mishmash of artist names I’ve never even heard of!
I hope we can arrive at a solution that compensates artists fairly, but I’m not holding my breath.
Let me know in the comments if you manage to get Stable Diffusion or DreamBooth up and running! I’ll do my best to answer any questions you might have along the way.
Amazing! Thank you for putting this together!
You bet John!
The scariest is definitely the Pixar one!!!
You look pretty damn cool in the others.
Thanks for the great work.
I can’t argue with you there Philip! Some serious uncanny valley action.
Wow, these are awesome! I played with Dall-e for almost an hour, and was intrigued, but didn’t get deep enough to create something quite as cool. NOYCE! (And thanks for sharing the recipe you followed! Will absolutely give this a try…)
I’ve never created anything particularly impressive with DALL-E. Right now Midjourney v4 is the cream of the crop, so that’s your best bet if you don’t have the patience to mess with Stable Diffusion.
That’s great to know, thank you. I’m a bit confused by the many, many options. 🙂 I just watched multiple YouTube tutorials via the YouTubers you shared. So good!
I found yet another, Albert Bozeson, who’s focused on tutorials only. Continuing to explore!
You can see why I didn’t attempt to write the definitive guide to Stable Diffusion! Great find!
There is not that many options. Like Brian said, Midjourney v4 is currently the best to get easy results. It’s just currently limited to 1:1 image ratio. Midjourney is used with Discord chat and you can try that for free.
Stable Diffusion is serious contender and you didn’t hear this from me, but there is a free discord server Unstable Diffusion that let you generate images without restriction (=lot’s of NSFW content) for free. In your phone.
Installing Stable Diffusion locally goes in to nerdy section, but it is the most fun way to use it. I get my AI tutorials from Aitepreneur.
Btw, Brian:
Have you found the SD upscale -script in the img2img tab? With that you get almost the MJ v4 upscale detail quality.
I came THIS close to including Aitepreneur in my list. Good stuff.
I have indeed messed around with SD upscale, but my results weren’t very good! I used “highly detailed” as the prompt and experimented with different CFG and denoising amounts, but gave up.
It’s easier for me to just generate 1024×1024 images in the first place, with highres fix, over Google Colab.
Brian, your avatar is as handsome as I’d expected!
Curious- did you get the e-mail about Drooble shutting down? And how they’re ready to hand it off to anyone willing to take it off their hands?
Aww shucks! 😉
I did indeed get that email! Their site has been crazy slow and intermittently down for months, so it doesn’t surprise me.